
Germination Vignette Guide
Introduction
The main function of the Internet of Things (IoT) is to connect various "things" through the internet, enabling data collection, transmission, and automated control. For example, a smart air conditioner at home can automatically adjust the temperature, and a mobile phone can remotely control the lights—these are examples of IoT. Simply put, it means "connecting things and enabling intelligent intercommunication."
Motivation
In agriculture, seed germination rate and early seed cultivation are crucial steps, as they directly impact crop growth, yield, and overall economic outcomes in farming. The main factors affecting seed germination rate include seed quality, environmental factors, seed treatment, and physiological condition. Environmental factors such as temperature, moisture, and light play an important role. By controlling these environmental variables, seeds can grow better, ensuring a higher germination rate and healthy early growth.
The Role of IoT in Agriculture
In agriculture, IoT can help farmers work more efficiently. For instance, using sensors to monitor soil moisture, temperature, and weather changes allows farmers to accurately determine when to irrigate or fertilize. Smart cameras can observe crop growth and early detection of pests or diseases. Additionally, technologies like automatic irrigation systems and drones for pesticide spraying can reduce labor costs and improve yield and quality.
In this vignette, we will demonstrate a seed cultivation system that demonstrates some of these applications of IoT.
Vignette Contents
The complete bill of materials for the vignette, excluding the base structure, includes:
- ZimaBoard 432
- ESP32 (model ESP-WROOM-32, Type-C USB, 38 pins)
- Seed Starter Tray Kit
- Grow Lights
- 5V 1A DC Power Supply
- Breadboard Jumper Wires
- 3D-printed water tank
- XY MOS
- Heating plate
- Smart switch
- Water pump
- Water pump tubing
- PLT-1 Plant Sensor
- Wireless keyboard and mouse
- Router
- Smart TV
- Ethernet cable
1. The Software
The vignette consists of two main platforms: Home Assistant, Node-Red, and Extended OpenAI Conversation.
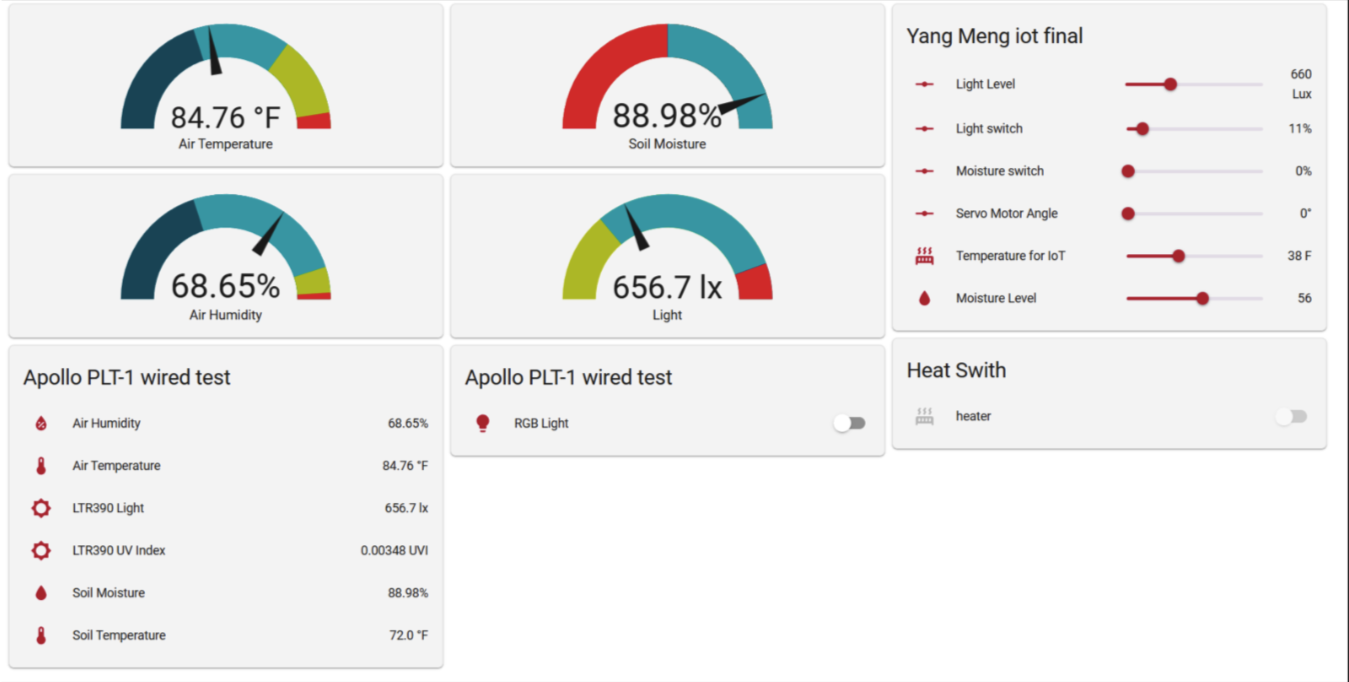
Home Assistant is an IoT hub platform around which the vignette is built. While originally intended for smart home applications, its features are equally useful in industrial IoT scenarios. Unlike more advanced industrial platforms, Home Assistant is better suited for small-scale systems. It's open-source and highly user-friendly thanks to abundant documentation and community support.
Node-Red is a visual programming platform that simplifies device connectivity and data flow management. It enables coding-free configuration of automation and interaction logic without needing to learn a programming language.
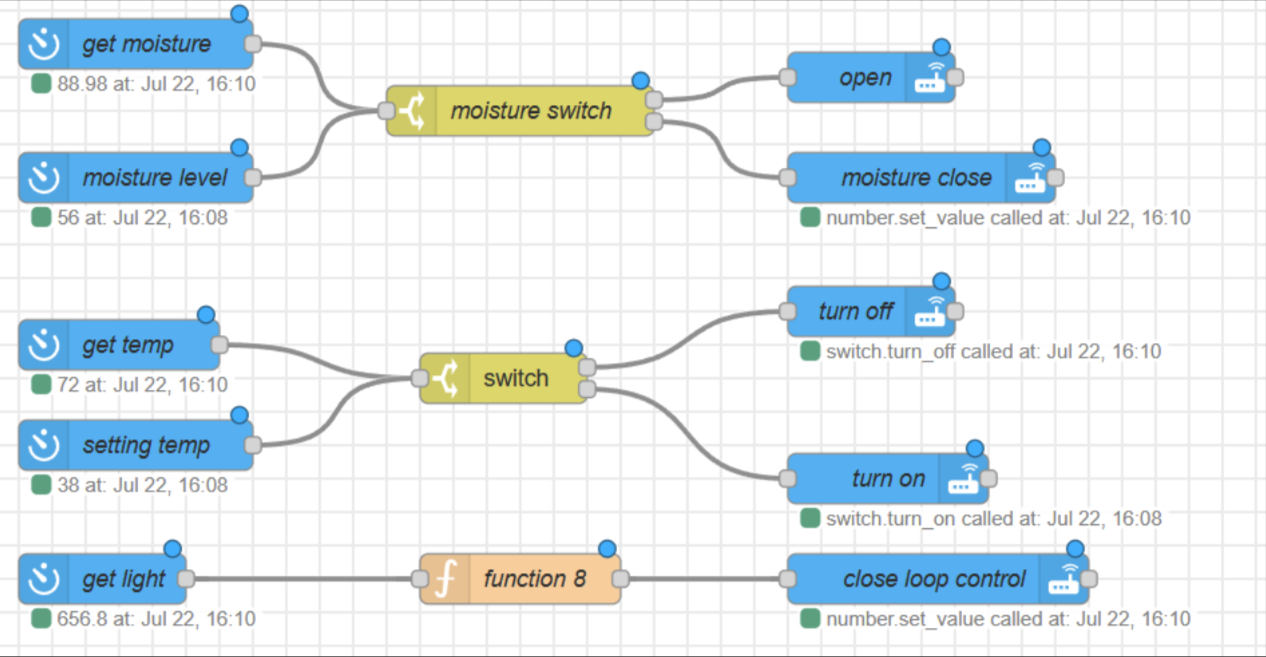
Although Node-Red itself has IoT and dashboarding capabilities, Home Assistant offers better flexibility and device support, as well as more intuitive dashboard management. Therefore, we use Home Assistant for those tasks and Node-Red for simpler automation programming.
Extended OpenAI Conversation: As large language models (LLMs) have become increasingly popular, we've integrated LLM functionality into our IoT system to achieve more automation. This allows the entire system to be controlled via voice commands. For example, you can say “set the best environment for strawberries,” and the LLM can automatically adjust temperature, humidity, and light intensity to optimize conditions for strawberry growth. Note that this requires internet connectivity.
2. The Hardware
In addition to the main table, router, and necessary cables, there are three categories of components in this vignette: the main computer, microcontrollers, and sensors/actuators.
2.1 The CPU
We use the ZimaBoard 432 as the main control computer. It runs Home Assistant and Node-Red platforms, along with auxiliary software for integrating all components. It is set to automatically power on and start Home Assistant and Node-Red upon receiving power. The UI can be accessed via Wi-Fi, provided you're on the same local network. The access address is: 192.168.13.115:8123 or http://homeassistant.local:8123
2.2 Microcontrollers
Two ESP32 microcontrollers are used: one for collecting and transmitting sensor data (integrated in the PLT-1 Plant Sensor), and the other for controlling actuators. Communication between the two ESP32s is handled wirelessly through Home Assistant.
2.3 Sensors and Actuators
2.3.1 PLT-1 Plant Sensor
We use the PLT-1 Plant Sensor as our environmental monitoring device. PLT-1 is a multi-sensor for indoor plants capable of measuring soil moisture, air temperature and humidity, light intensity, and UV levels. It also features an onboard piezoelectric buzzer and addressable RGB LED. An optional temperature probe can be used to measure soil temperature.
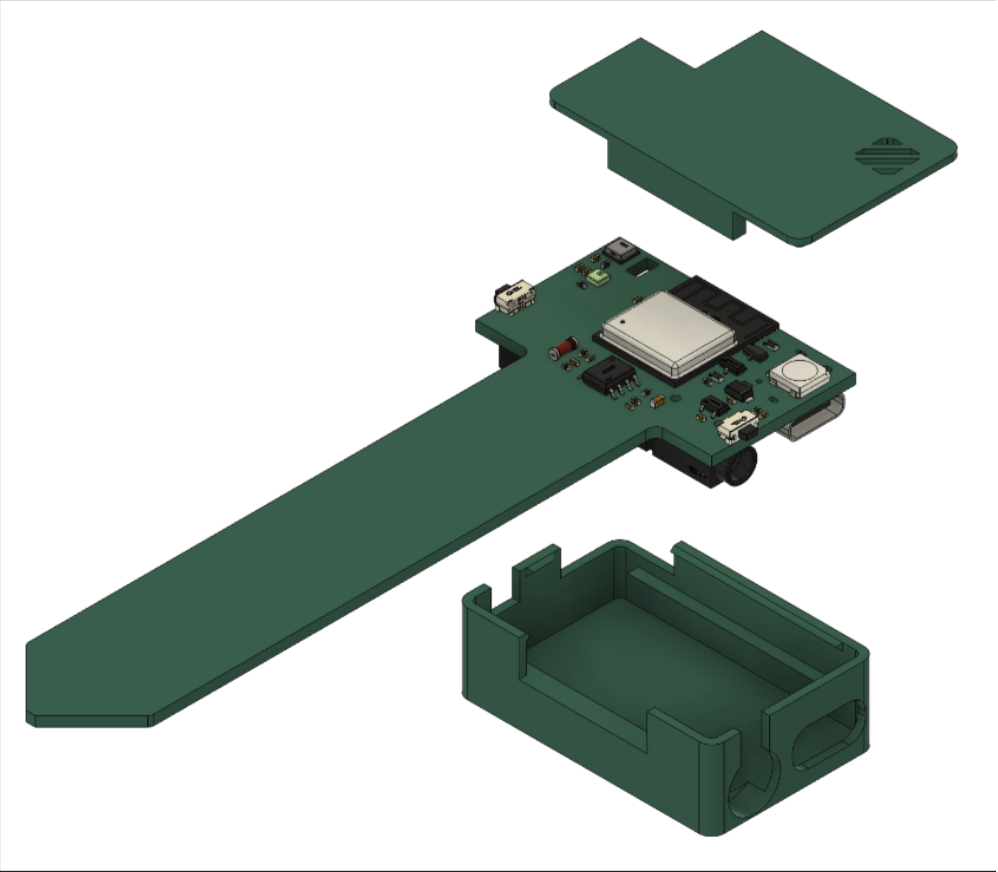
The sensor integrates the following components: LTR390, soil moisture sensor, AHT20-F, and DS18B20.
This sensor should be placed directly in the environment to be measured. Due to its low default data update rate, it requires reprogramming to meet real-time data update needs. Code repository: https://github.com/ApolloAutomation/PLT-1.git
2.3.2 Water Pump and Lights
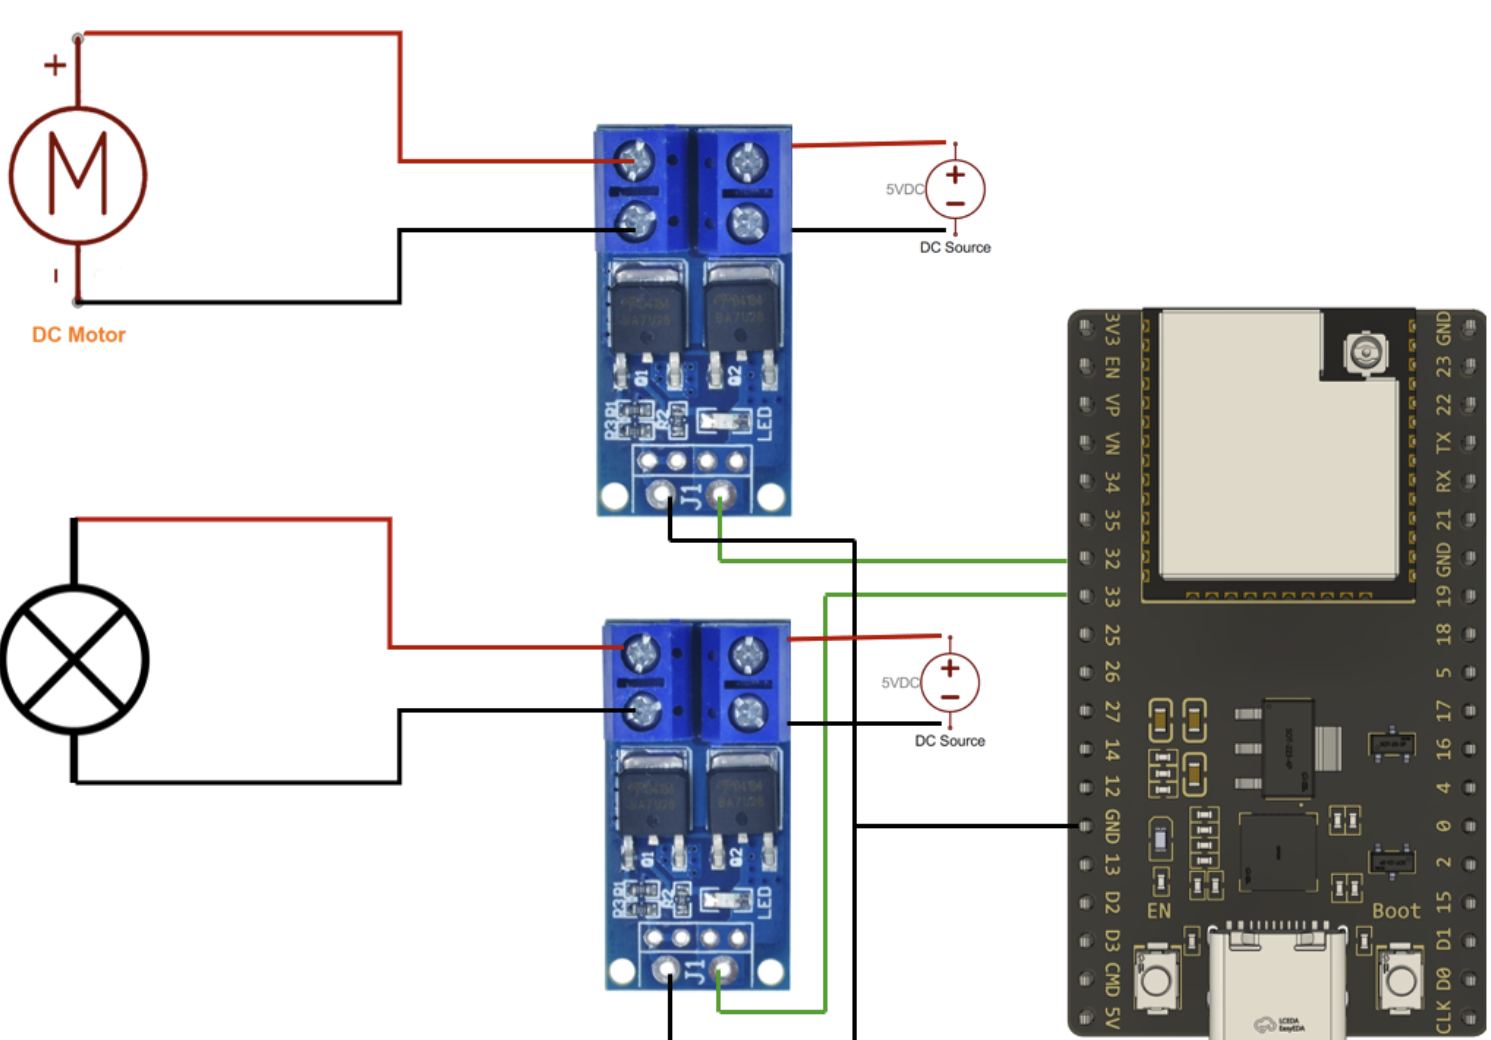
The pump and lights are directly connected to the ESP32 and controlled via Node-Red. The lighting is controlled using a proportional closed-loop controller for stable brightness regulation. The pump is open-loop controlled: when soil moisture falls below a threshold, Node-Red activates the pump to water the plant.
All control is managed via the XY MOS module. XY-MOS is a high-power MOSFET-based electronic switch driver module typically used to control DC loads such as motors, lights, or heaters. It supports up to 15A current and 400W power output and allows for PWM-based speed, brightness, or power adjustment. It is suitable for Arduino and microcontroller control systems, providing efficient and safe load control.
2.3.3 Smart Switch and Heater
Since the heater requires high voltage and cannot be directly connected to the ESP32, we use a smart switch for control. When temperature drops below a set threshold, the switch automatically turns on the heater.
2.3.4 Water Tank and XY MOS Box
The water tank and XY MOS enclosure are 3D-printed. Download the 3D models here: https://drive.google.com/drive/folders/10lldYIb2PeSPFJN9Y6Pg2JNNu8kZePZe?usp=drive_link
3. Installation
3.1 ESP32 Wiring
3.2 PLT-1 Plant Sensor
Simply power on and insert the PLT-1 sensor into the soil to use it.
Vignette Usage Instructions
In theory, you only need to plug in the power and wait for the system to boot—no further operation is required.
Notes
- All GUIs are accessed through the local Wi-Fi network. If access fails, try visiting:
192.168.13.115:8123 or http://homeassistant.local:8123
Username and password are both if-iot-box. - Motor keeps spinning: This may be due to the soil moisture sensor not being fully inserted into the soil. Push it deeper into the soil; it usually stops within a few seconds.
- Plant growth note: When plants grow to a certain size, transplant them to another environment.