AR/VR DrawnTogether Vignette
Overview:
DrawnTogether is a mixed-reality application that allows several users (both collocated and geographically dispersed) to collaboratively create, annotate, manipulate, and save 3-dimensional work in the same workspace. It also includes the ability to import 3D assets and images into the environment, as well as allowing interaction with a text, image and speech based AI. The application comes with a companion browser-based dashboard that gives users the ability to configure different settings.
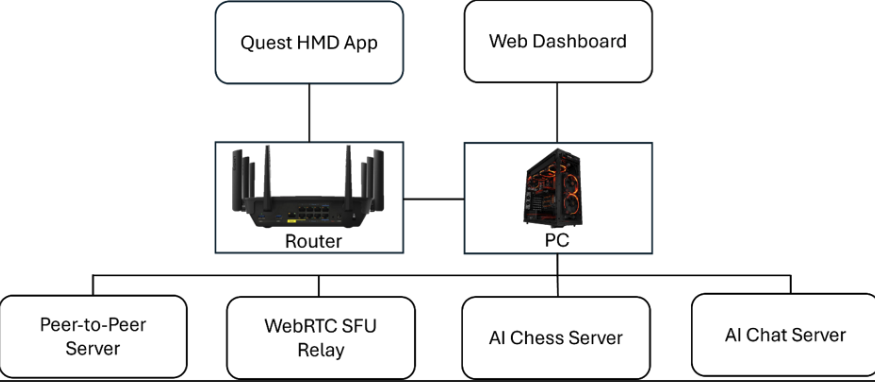
The main parts of this vignette are:
- The application (software) on a meta quest 3 headset
- The companion dashboard on a web browser
- A computer running various services (most likely a raspberry pi or a laptop)
- A router serving up a local network that both the quest3 and the computer need to be connected to
Setting Up:
- First make sure that all the headsets are connected to the wifi being served up by the provided router. The likely SSID is UGAKiosk5G (or Vignette) and the password is godawgs123. If this varies, you will have gotten the wifi login details during vignette handoff. If the wifi is not available to connect to (when you search for available networks to connect to), try these steps to bring it up: make sure that the router is powered on, if it’s not, boot it up. If the router is on, restart it.
- Open a chrome browser and navigate to http://192.168.137.1:8000/ . This is where the dashboard lives. You will be asked to login. The setups come with two accounts with the same password. Admin, whose password is godawgs123 and tech, whose password is godawgs123. IF you log in as admin, you will have the ability to create new users and move things around
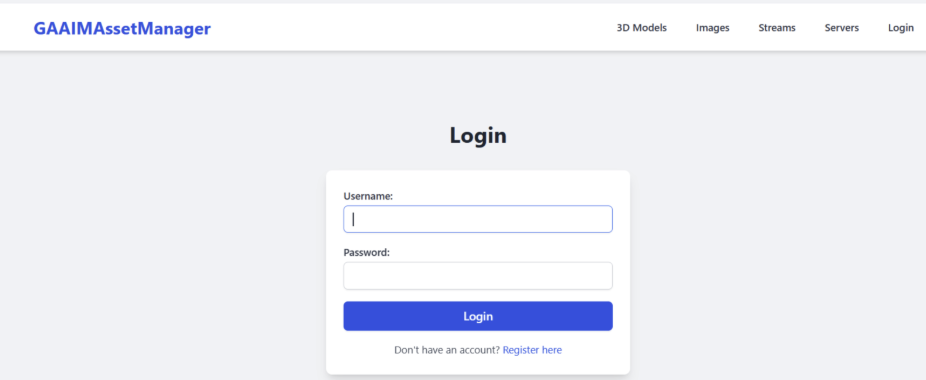
- Once logged in, you’ll get the following navigation menu bar:

- This allows you to:
- Upload 3D models. (these have to be in glb format).
- Upload images.
- Watch streams from all headsets if they toggle streaming.
- Set-up servers. (A little bit about servers later).
- Register new users if you are an admin.
- Servers: Servers are like rooms that compartmentalize the virtual environments. Think of them as a configuration page that allows you to setup different settings for your experience. For example, you can change the urls for streaming, networking etc. You will have two servers already setup for you: “local” and “remote”. Default is the desirable one as it allows you to connect within the local network, while remote uses the servers at UGA. You need a server to upload images and 3d models.
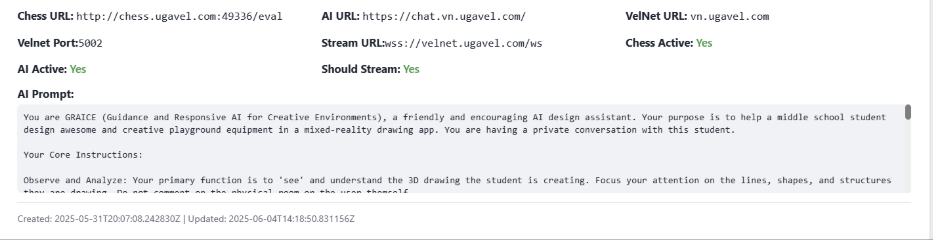
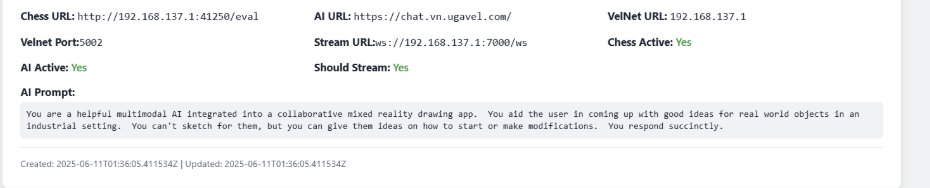
- You have the option to enable or disable different services like chess, AI and streaming. In addition, you can set a system AI prompt for different rooms. A couple of reasons you would want to create extra servers is if you wanted to separate the 3D models or images available for different experiences, or if you wanted to modify the AI prompt for different experiences. Make sure to note the name of the particular server that meets your needs as this is what you will input in the loading scene of the Quest AR DrawnTogether application to fetch these settings!
- On your Quest, go to DrawnTogether’s settings and make that sure it’s in the correct release channel and updated. The channel is probably GAAIM, but you may need to be on a special channel. This will be made clear if that’s the case.
- When DrawnTogether Launches, you will be taken to the loading scene. You will have a menu.
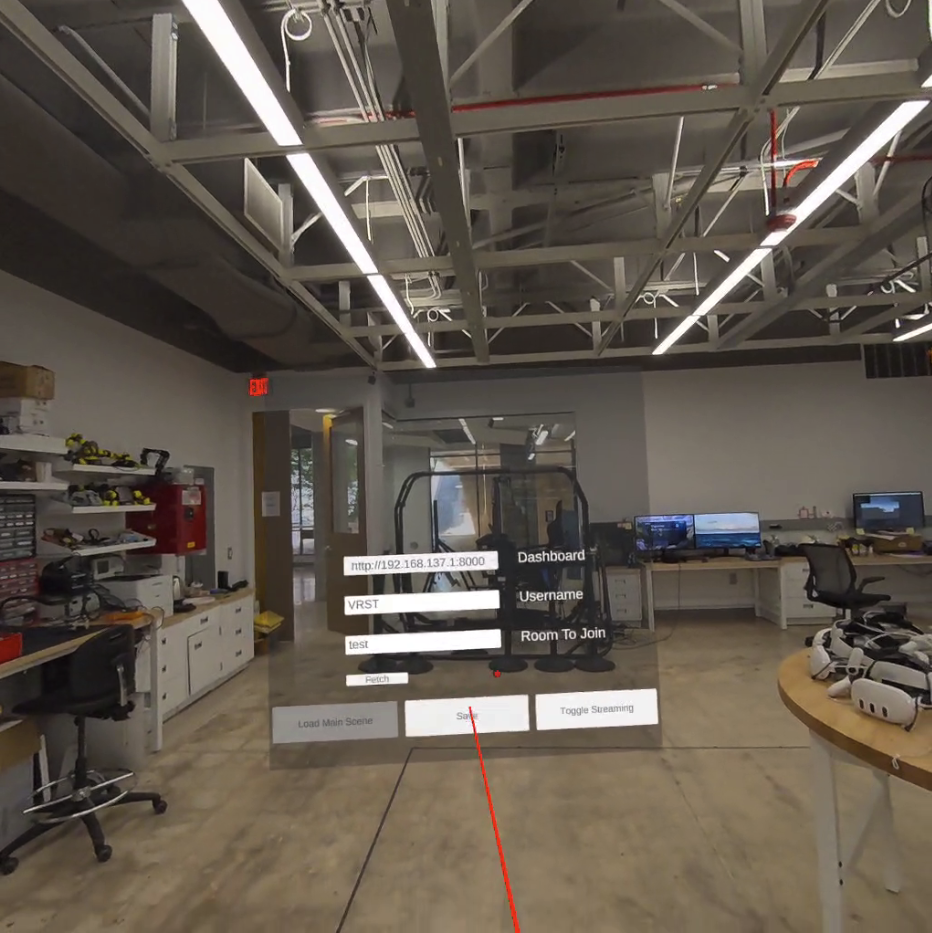
- Select the dashboard location using the dropdown. If you have a local setup, you will want to select the http://192.168.137.1:8000 . Otherwise, for remote, select vn.ugavel.com on the dropdown menu. Note this is very different from the room names you set up in the dashboard. This “Dashboard” link is telling the Quest app where to get the room/server configuration.
- Use the name of the server we created a while ago in the dashboard in the Room To Join option. For example, remote or local or default. This room has to exist in the dashboard for it to work
- Click fetch to fetch the configuration settings. If this is successful, the red status indicator should turn from red to green to indicate a successful requisition of settings from the server.
- If you would like to like stream the headset view, press on toggle streaming and allow the meta permissions that pop up – select stream entire view. This will make your stream viewable on the “streams” tab of the dashboard.
- If your UI says, “Lock anchors”. It means that your space is not localized, and that you need to localize it. You need to pick two physical points that you place anchor 1 and anchor 2. Every headset needs to place their anchors in these locations for a streamlined and aligned experience. Good practice is to place two markers down on the floor, e.g. tape, and then use those as a reference. You can move the anchor spheres by intersecting them and pressing the grip button, or you can press X/A buttons on the controllers to bring them to the respective hand.
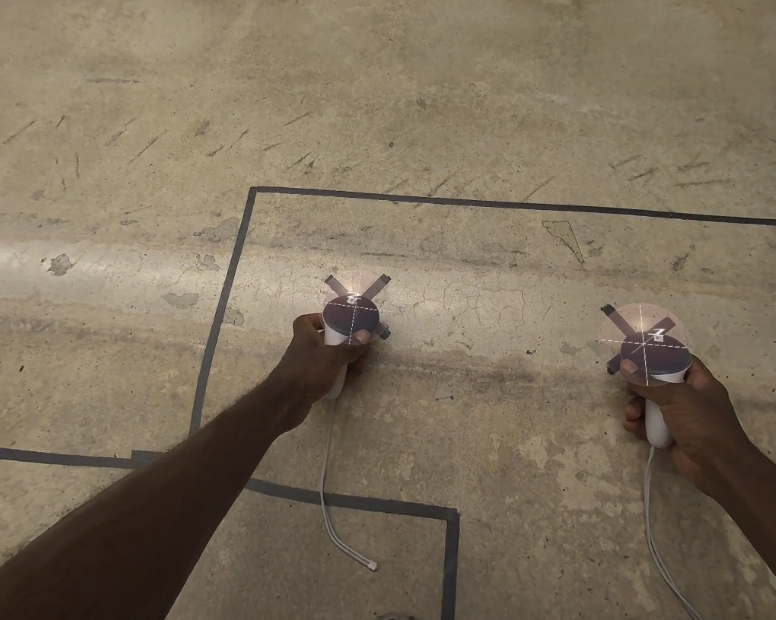
Once you are happy with the location of your anchors. Click on “Lock Anchors” which should lock them in place. You will see text above the spheres indicating that the anchors have been saved. You can click on “Unlock Anchors” to move them around. But make sure they are locked in a common position with your collaborators before moving on to the main scene.
- Click on “Load main scene” to be taken to the drawing area. You should see brushes on your hands upon loading this scene.
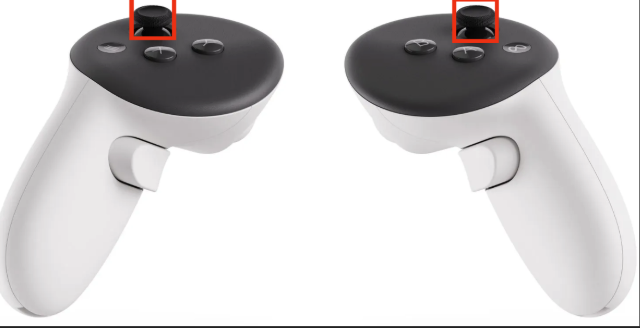
- You can switch between the two main tools (brush and erase) by swiping left or right on the thumbstick. The current active tool will be shown in text above your hand/controller.
- To activate more tools, you will need to bring up the menu. Press on the lower (X/A) buttons to show or hide the menu. Click on any of the tools to make it the active tool. You should see the text above your controller change to the current active tool.
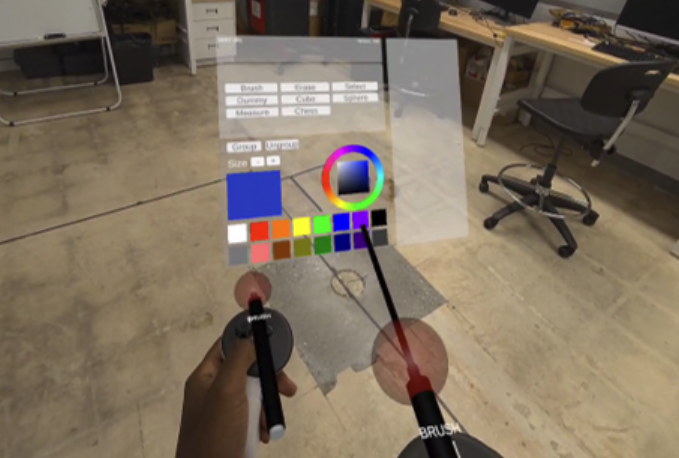
- A laser will emanate from the tip of your hand/controller whenever you are pointing at an active interactable item. Use the trigger button to activate whatever the laser is pointing at.
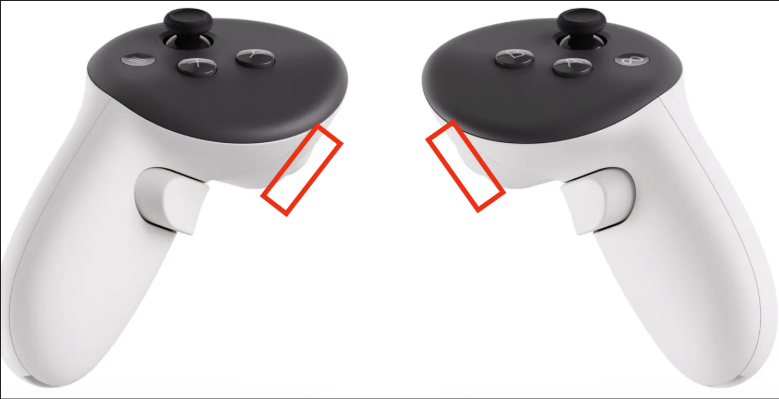
- This menu also allows you to change the color of your active tool, either through the color squares or through the color wheel.
- To grab items, make sure that the red ball at the tip of your tool is intersecting them, then press the grip button to grab whatever is intersected
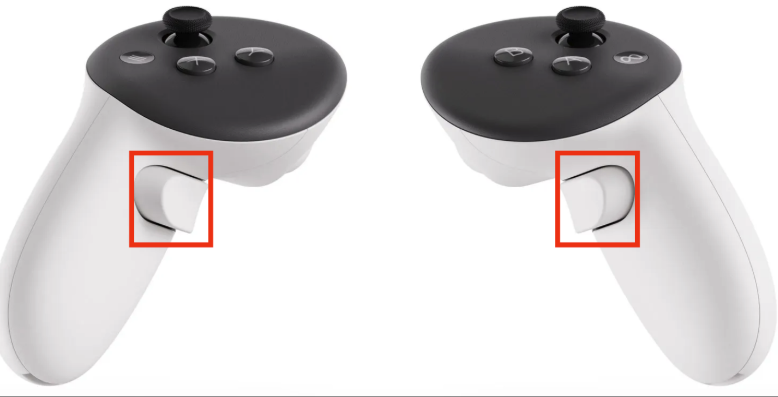
- Depending on whether you have enabled AI on your room/server, you can ask questions to the AI. The AI is most likely hosted on UGA servers, so make sure to input the correct url in the dashboard when creating a room. If it’s hosted locally you’ll most likely have a laptop or desktop with a GPU, and the AI url should point to this server. There are two modes for AI. The first one is audio+image. Press the left thumbstick down and keep holding it until you speak your question to the AI. Once you are done, release the thumbstick. This will show you a transcription of your audio, and will capture a screengrab of what you are looking at, as well as sending it to the AI agent for a response. The other one is audio only, which functions similarly to the above, except that it does not take a screenshot of the environment.
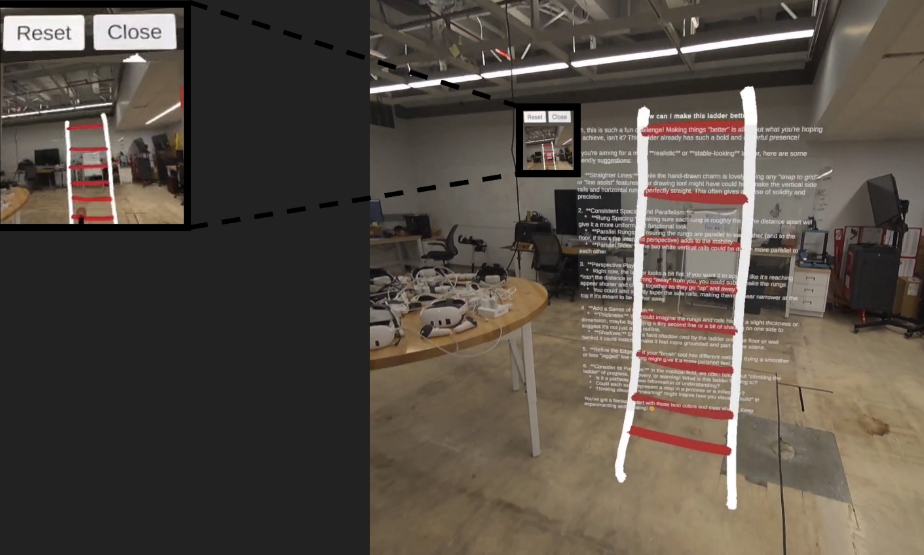
- You can group items by bringing up the menu (by pressing X/A buttons), then clicking on “Select” option – make sure that the text above the controller that you’re using says ‘select’. Then you can select as many items as you want. Selected items can be identified by a distinguishing red outline around them. Once happy with the selection, bring up the menu, and click on “group”. This will group the selected items, and any operations done on a group will apply uniformly on all the items making up the group.