AR/VR Collaborative Vignette
Overview:
This document will guide you through setting up the AR VR vignettes and troubleshooting in case anything fails. There are three main areas:
- For local self-sustained streaming and networking, you will need to start up some docker services on a laptop.
- Making sure that the headset is correctly setup (network connection, streaming, and guardian boundary)
- Running the vignette demos in AR or VR. This includes aligning the spaces so that multiple users can have a unified view of the environment, selecting the appropriate room, and highlighting the necessary interaction controls.
Short Version:
- Create mobile hotspot on the laptop
- Run docker containers for velnet, velconnect and queststream
- Make sure that the quest headsets are connected to the mobile hotspot and that guardian boundaries, notifications, and USB autolink are all disabled.
- Launch the application, align the spaces, and select a common room to join.
Detailed:
Create a hotspot on your laptop:
This ensures that the servers running on the laptop and the headset running the vignette are on the same network. In the windows search bar, type settings and click on the settings icon. Then, go to settings -> Network& internet -> Mobile hotspot
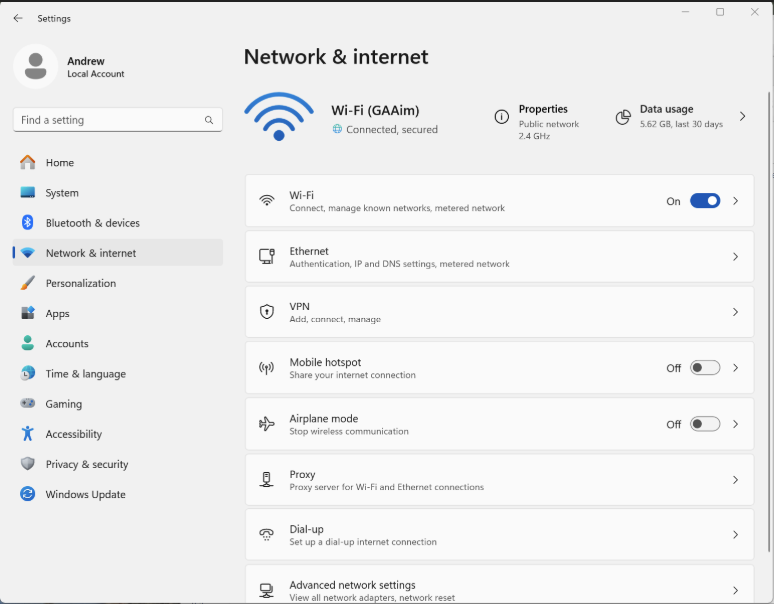
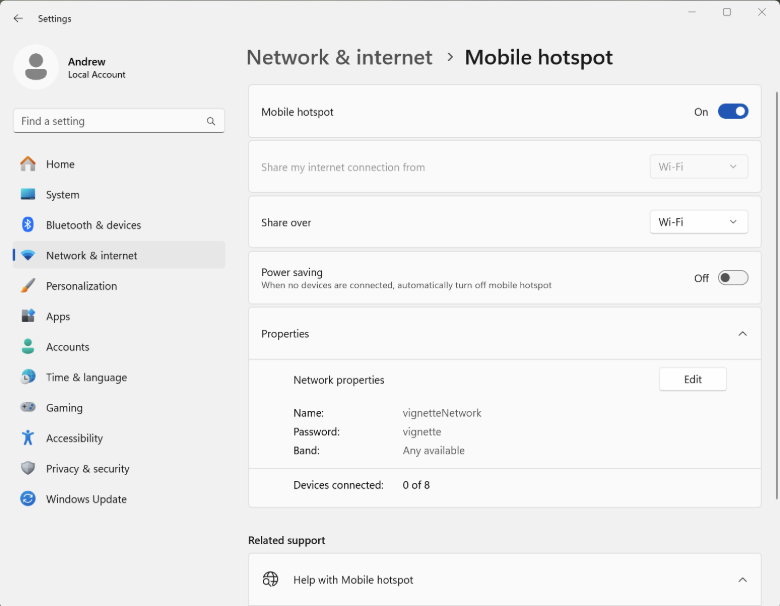
Click on the mobile hotspot button to make sure that it’s turned on. Share over wi-fi should be selected and power saving should be off. Give the network an appropriate name, e.g. GAAim, and password, e.g. vignette.
Launch the Velnet Docker Server:
This allows the application on the quest 3 networking traffic to run on the local network provided by the laptop mobile hotspot. For this, you need a computer with docker desktop installed (https://www.docker.com/products/docker-desktop/ ) . In addition, you need the Velnet source files, the velconnect source files and the scrcpy source files (these can be cloned from the Velaboratory organization’s GitHub).
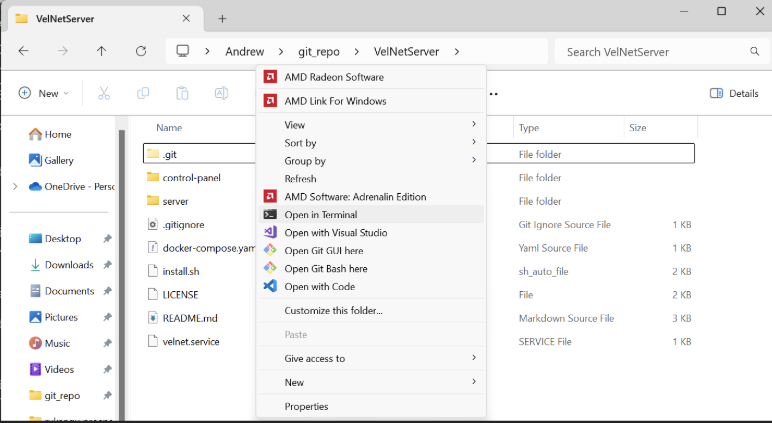
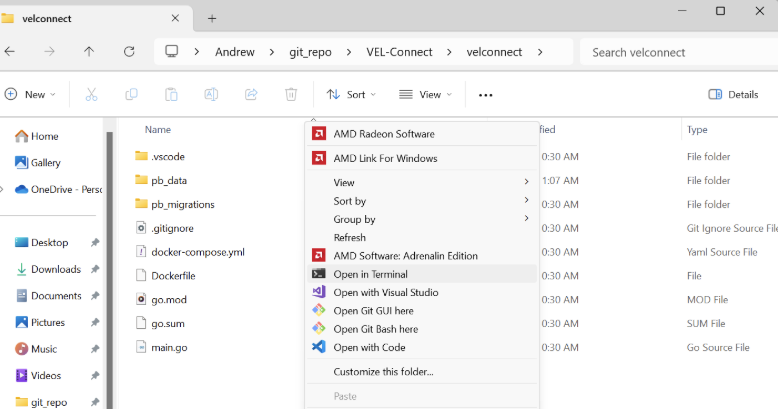
Navigate to the VelNetServer directory and right click anywhere on it and select open terminal:
If this is the first time, run the command : docker-compose up –build.
Otherwise, for subsequent times, run docker-compose up.
These commands will start the velnet server on the laptop/computer.
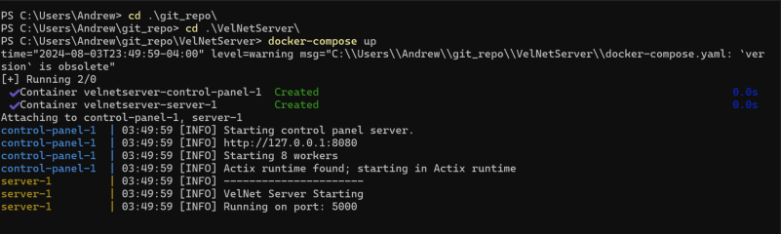
Run the Velconnect Docker server:
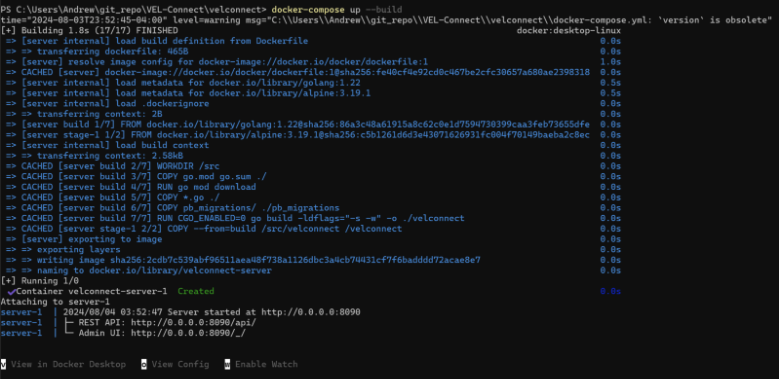
Similar to the process above, open the directory containing the velconnect source and navigate to VEL-Connect -> velconnect and run the commands to start the docker service. (the directory should have a docker-compose.yml file in it).
Run docker-compose up -–build if this is the first time or docker-compose up if it’s for subsequent times.
Start the queststream docker server:
This allows you to stream contents from your headsets on the laptop/computer. Similar to the previous two docker services, find the queststream folder, open it in the terminal and run docker-compose up -–build if the first time or docker-compose up if it’s for subsequent times.
Quest 3 Headset Setup:
- Connect to the laptop mobile hotspot you created. Click on quick settings in your Quest3 headset, then click on wifi , and find the network you created before and connect to it. Disable notifications (to prevent glitches while streaming the headset view to the laptop. Go to settings -> notifications -> Do not disturb).
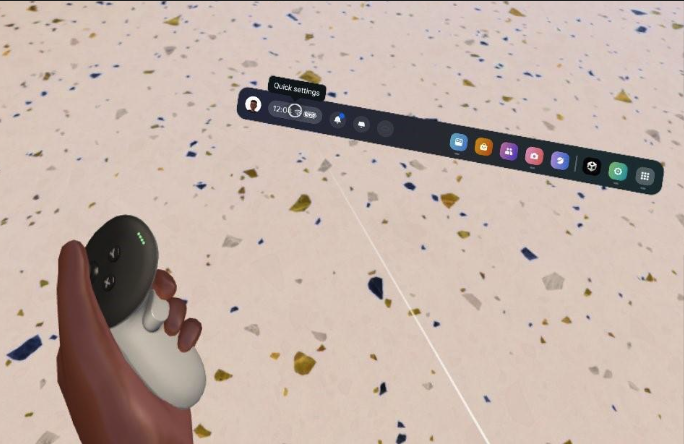
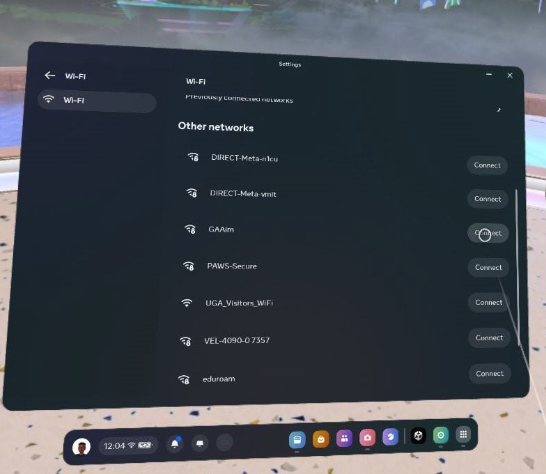
- Disable guardian boundaries and autoconnect to quest link. Go to settings -> system -> developer.
If custom settings are not visible, click on “enable custom settings.” This should reveal more options. When the new options appear, disable both physical space features and USB link autoconnect.
Running the Application and Streaming:
- Streaming: Connect the headset to the laptop with a usb cable. Navigate to the questream folder and open scrcpy folder. Double click on start_server_random_local.bat to run it. This should start a stream of the headset view on your default browser.
- Application: Find the application in the applications and run it. Use the grip buttons to pick up objects.
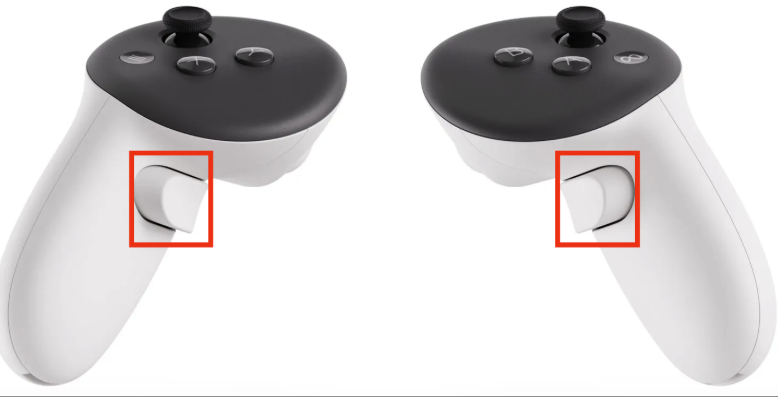
Use the trigger buttons to interact with UI elements.
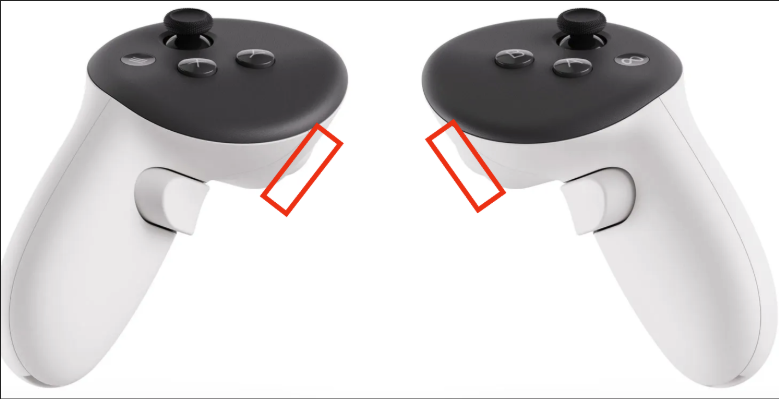
If you run the application for the first time, you will be taken to the alignment scene, where you need to place two spheres on physical landmarks in the real world. For alignment to work, each user needs to put these spheres in the same spots. Also, select a common room between the headsets that you want to be in the same space, for example VigenetteDemo.
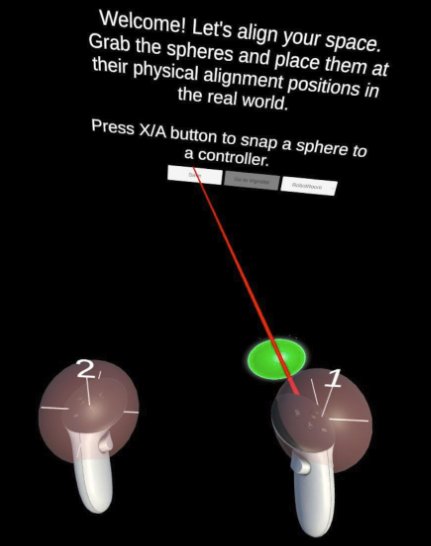
Once aligned, click on save, and click on go to vignette to load the vignette scene.
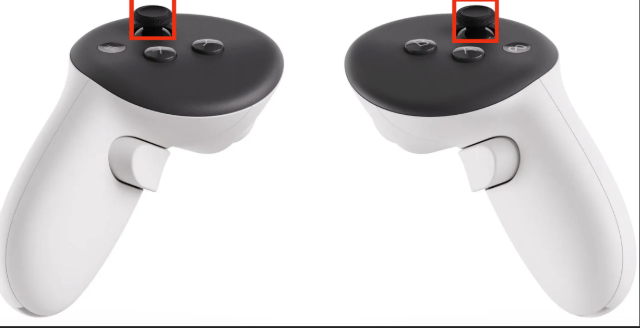
If you would like to go to the alignment scene manually, press both thumb sticks down simultaneously at any time.