
Image Recognition Setup
- Introduction
- Prerequisites
- Application of the Fundamentals
- Downloading software, installation
- Running Model
- Training Model
- Implementing Model
- Conclusion
Introduction
Welcome to this step-by-step kit on Object Detection. As we learned in the Image Recognition Overview, object detection is a powerful technique that enables machines to recognize and locate objects within an image or video. In this kit, you will learn how to download, set up, and run a pre-trained model from an open-source repository in GitHub. This kit will also cover how to train and run your own model using the training code in the open-source repository. We will walk you through the process step-by-step, starting with the basics and working our way up to running a model with a live webcam feed. By the end of this module, you will have the knowledge and skills necessary to implement object detection in your own projects and applications.
Prerequisites
Equipment:
- Computer with internet access
- Webcam that is compatible with your computer
Application of the Fundamentals
Downloading Software, Installation, and Setup
- Download Anaconda from anaconda.com
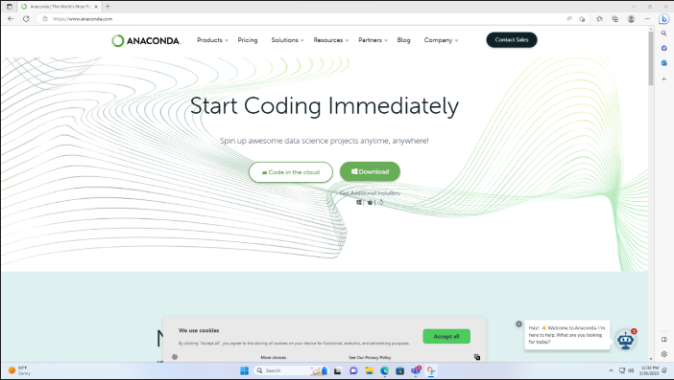
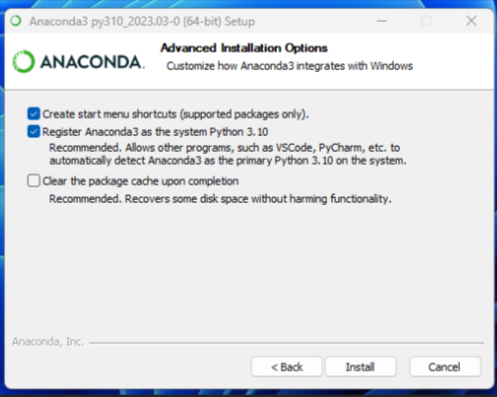
- Download Cuda if you have an Nvidia GPU, otherwise skip this step
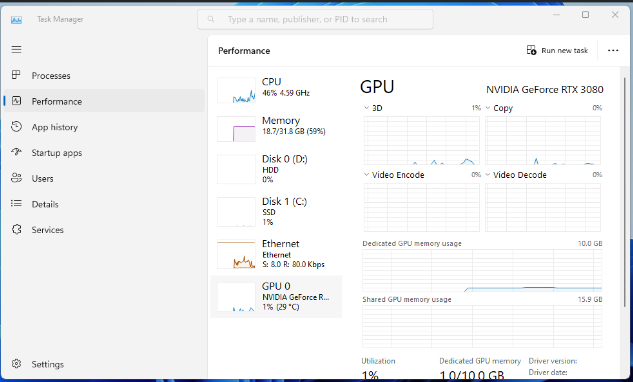
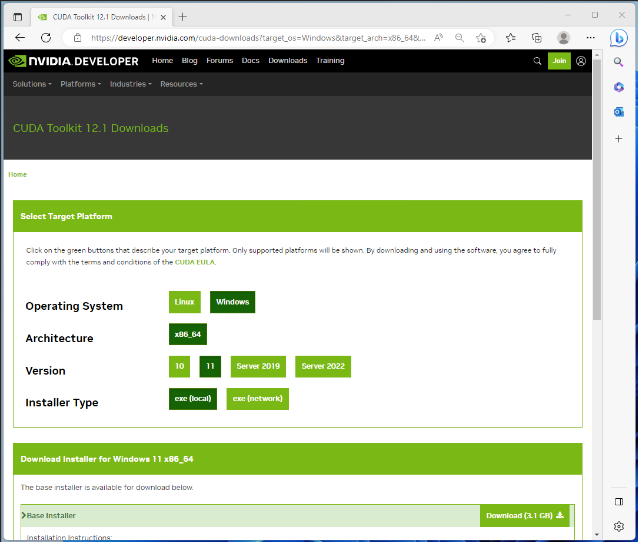
- Clone the Yolo V5 GitHub repository to the local drive
- In your command prompt or terminal, type ‘mkdir PythonProjects’ and then ‘cd PythonProjects’
- Type ‘git clone https://github.com/ultralytics/yolov5.git’ then cd yolov5’
- Alternatively download as a zip file and follow the steps below.
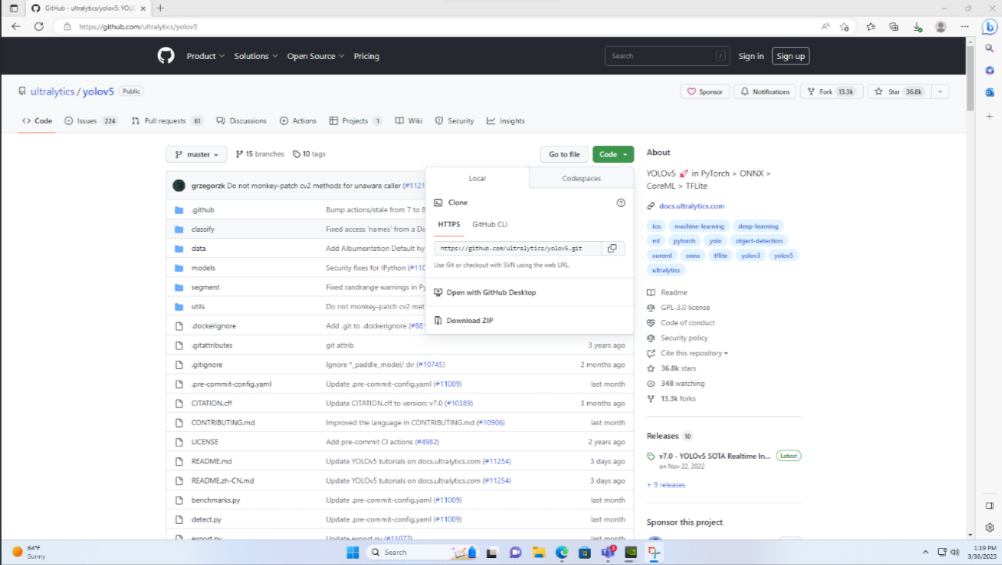
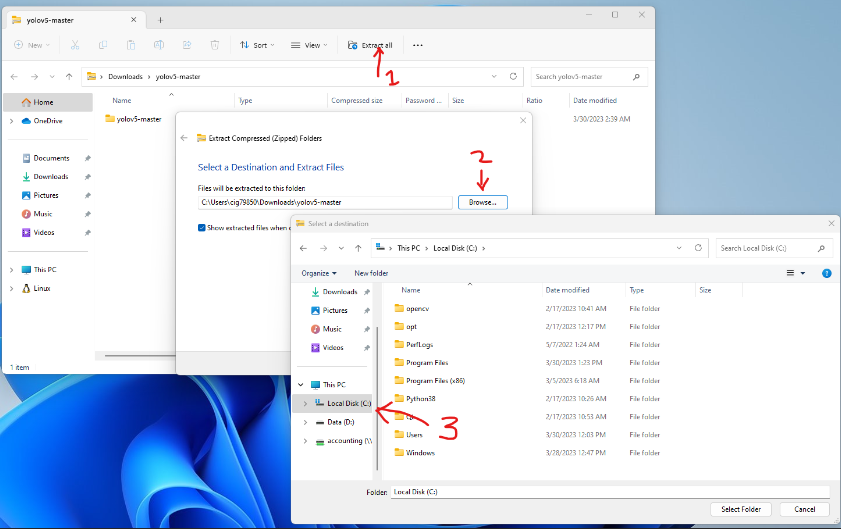
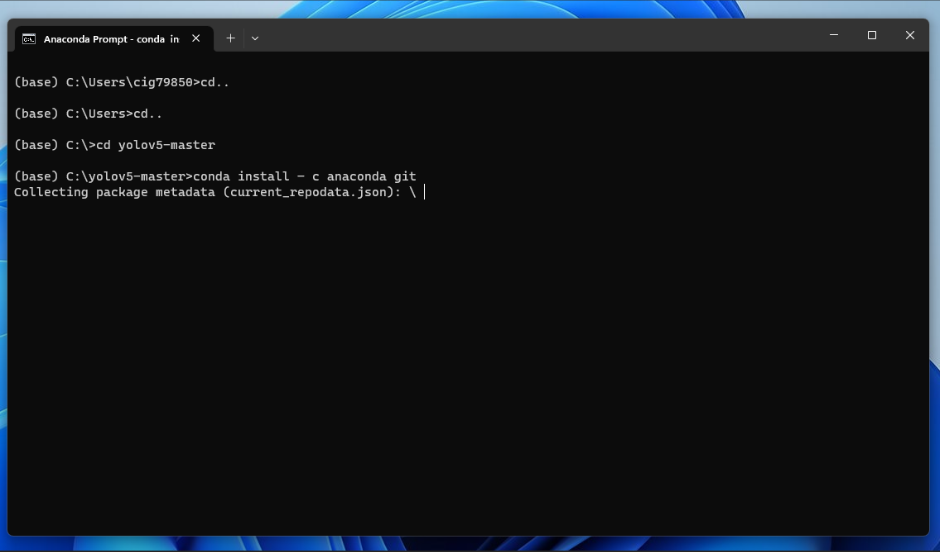
- Open the Anaconda 3 Prompt as a user and type ‘cd..’ and then press enter. Continue this process until you have returned to your home directory (c:\ on windows)
- Type ‘cd yolov5-master’ and press enter.
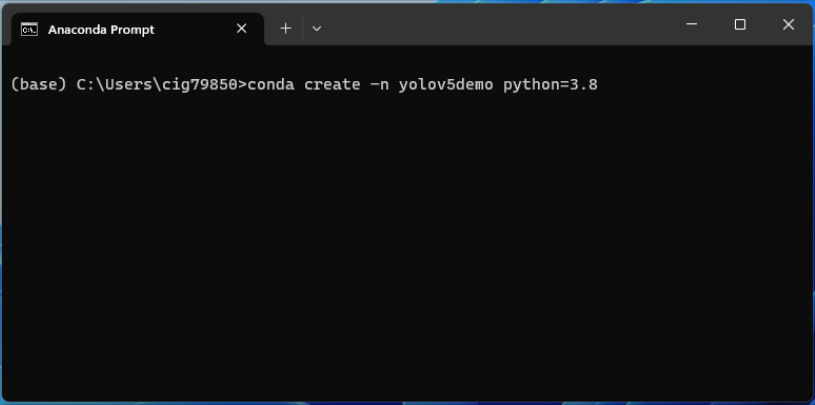
- Type ‘conda create -n yolov5demo python=3.8’ and press enter. yolov5demo can be replaced with anything you want to name your environment.
- Type ‘y’ and press enter.
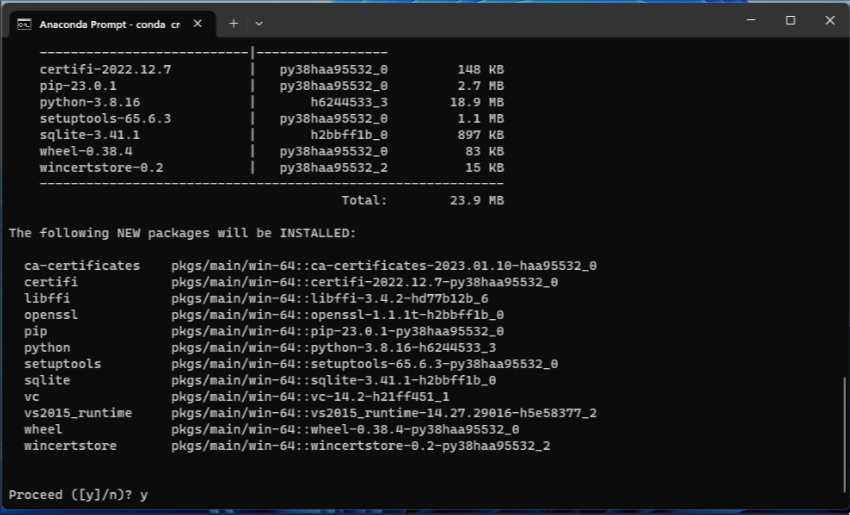
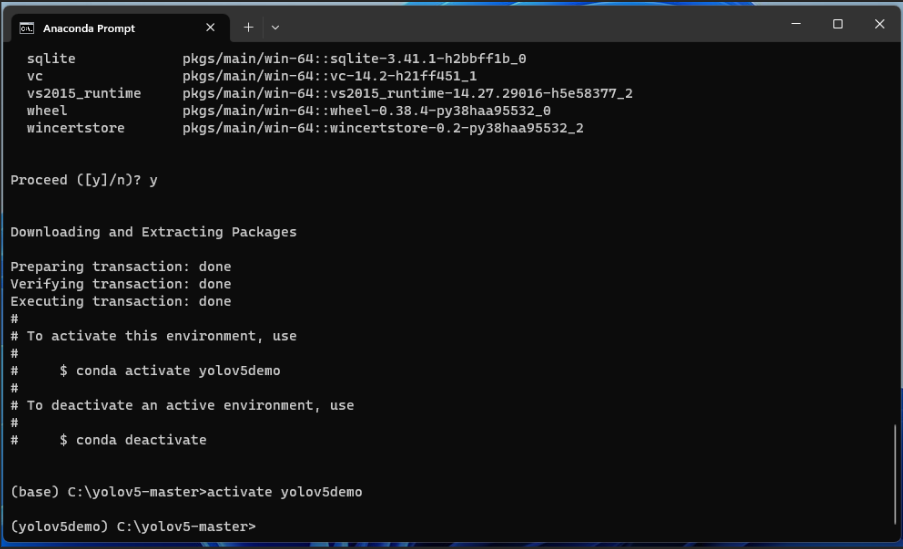
- Type ‘activate yolov5demo’ which will activate the environment
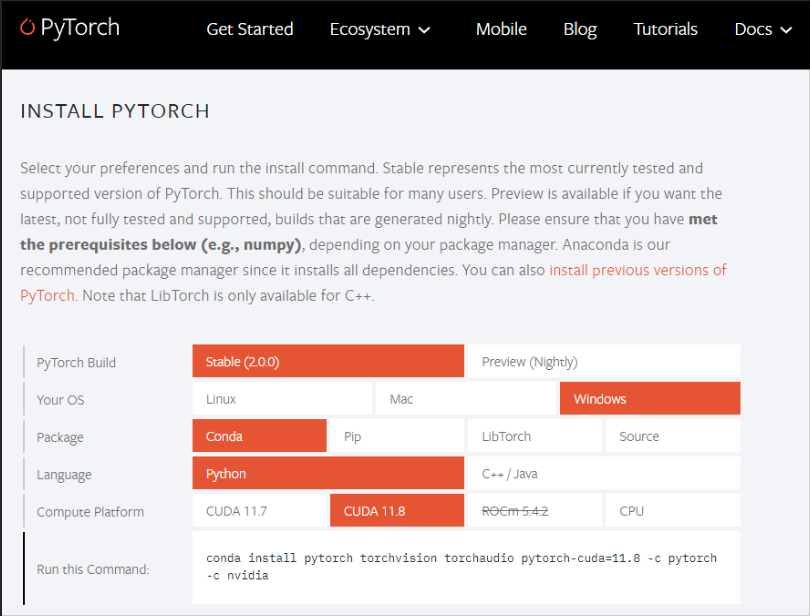
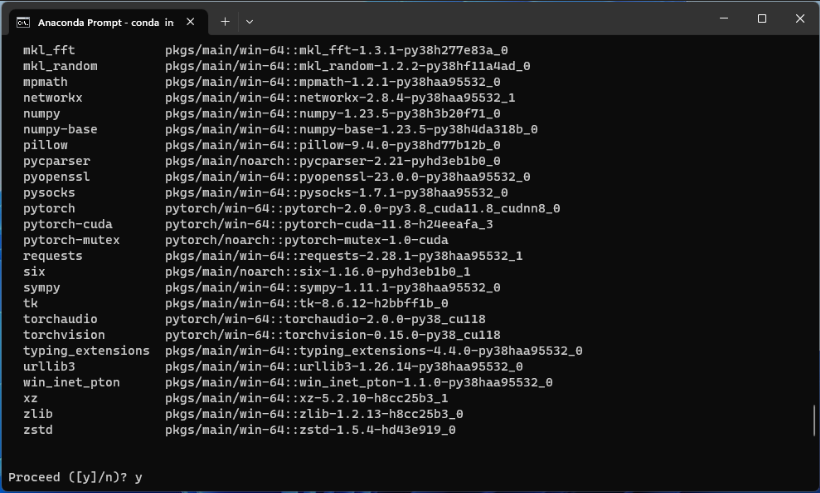
- Download Pytorch in the Anaconda 3 prompt by typing the conda or pip command based on your hardware (see pytorch website).
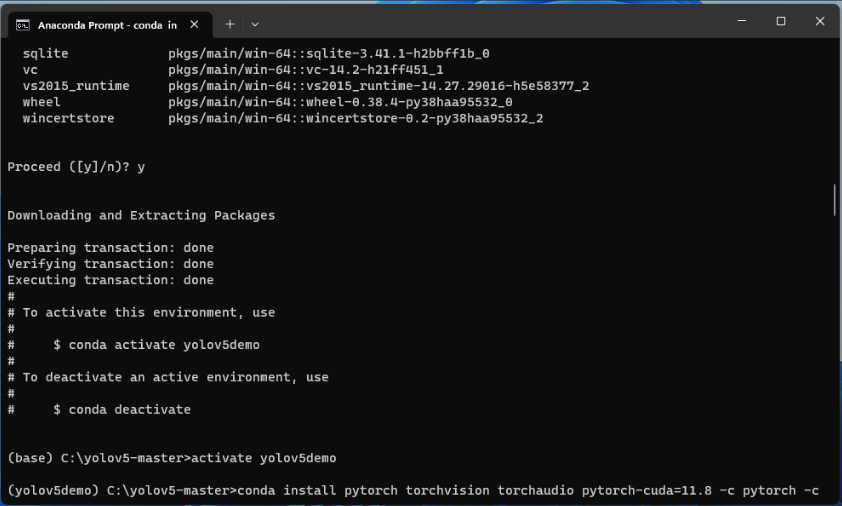
- Type ‘y’ and press enter.
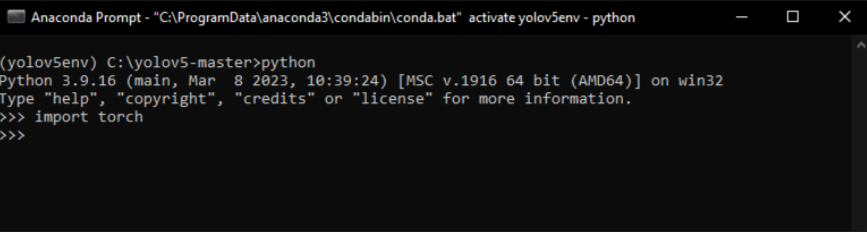
- To verify the previous step in the same prompt session type: python (press enter), then type: import torch (press enter). If your terminal looks like the one below you have successfully downloaded pytorch, otherwise return to step 6 and give your new environment another name. Once you have successfully installed pytorch, then type: exit() or press ctrl+c to return to the normal terminal command line.
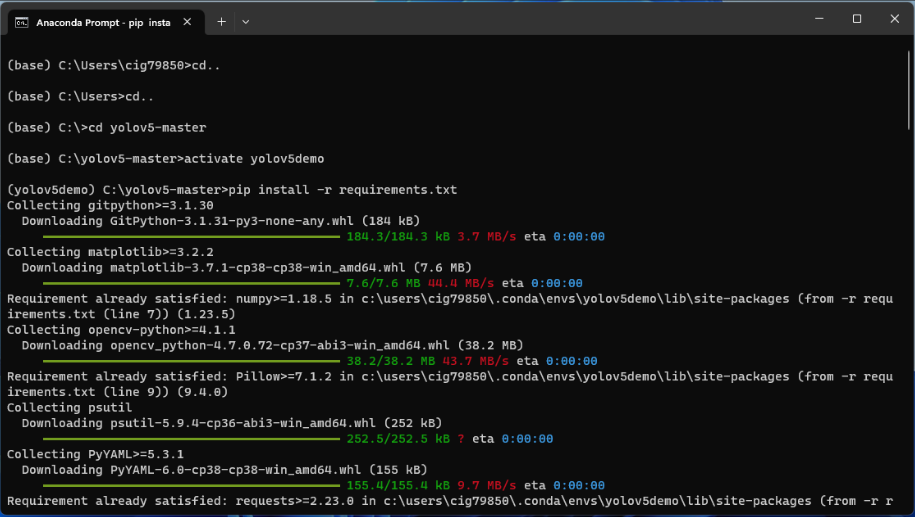
- Type ‘pip install -r requirements.txt’ and press enter.
Running Model
- Type
python [detect.py](http://detect.py) —-source o —-conf-thres 0.3 —-weights yolov5s.pt
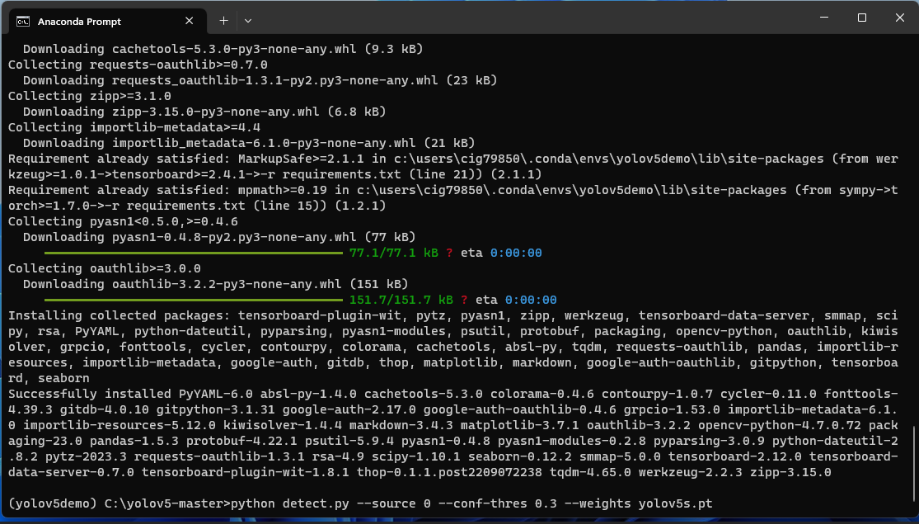
- Congratulations you are now working with AI! Press ctrl + c to exit
Training Model
Here is a list of items that Yolov5 is pre-trained to recognize.
When training a model to recognize a custom object the two options are to create or download a dataset of your desired custom object. If you find a dataset the following two steps can be skipped.
- Create a folder with the images of your desired custom object
- You will need images to train, validate, and test your model.
- See useful links for more information on best practices, but essentially the more images you have will result in a more robust trained model.
- Register a free account with Roboflow to create a customized dataset based on the images in your folder
- Roboflow will assist in image labeling. This includes classification and creating the bounding boxes for your custom dataset.
- At the end of your image labeling, you will be able to export your custom dataset as a zip file or download code to import into a python script.
In the yolov5 GitHub documentation there is a tutorials tab, select the “Train Custom Data”
- There will be a “YOLOv5 Custom Training Notebook” hyperlink at the top that will take you to a tutorial in google co-lab.
- This will provide you with detailed instructions and a python environment for you to train a custom model. Besides copying and pasting your download code from your Roboflow data set, this process will require minimal effort as well as reading and triggering the code blocks.
- At the end of the tutorial, you will have a trained model weight that you will be able to download and deploy.
- Useful links
- https://github.com/ultralytics/yolov5/wiki/Tips-for-Best-Training-Results
- https://github.com/ultralytics/yolov5/wiki/Train-Custom-Data
- https://www.youtube.com/watch?v=rZyY2pNzypQ&list=PL_AqTvXPOgUN6REgGuef_Njhb5Zcd633c&index=5
- https://www.youtube.com/watch?v=RXbtSwZsoEU
- https://blog.roboflow.com/tips-for-how-to-label-images/
Implementing Model
- Back in the anaconda prompt terminal, type ‘python detect.py — source o —conf-thres o.3 —weights file_location_of_your_trainined_model
- Press ctrl+c to exit
Conclusion
You have completed the step-by-step kit on object detection. By now, you should have a solid understanding of what object detection is and how it works, as well a popular open-source framework used in the field. You should also have learned how to set up and manage your coding environment using Anaconda. As mentioned previously, object detection is an essential technology with countless applications in various industries, including healthcare, security, and manufacturing. By mastering the skills covered in this kit, you are now equipped to apply object detection to solve real-world problems, such as detecting defects in manufacturing processes or identifying anomalies in security footage. As with any technical skill, mastering object detection takes practice and dedication. We encourage you to continue learning and exploring this exciting field and to apply what you have learned to make a positive impact.